Pop Bottle Upcycled Craft
Easy to make and great for plants, these upcycled self-watering planters are a great way to upcycle plastic bottles.
A No-Fail Method For Houseplants
I grew up in a house filled with houseplants and now fill my own home with them too. Few things cheer up a room as much as live plants. But if you are anything like me, consistently keeping your plants watered can be a struggle. I found a solution to my inconsistent watering with simple upcycled soda bottle self-watering planters.
These planters are super easy to make and effortlessly give plants the exact amount of water they need. The water is held in a reservoir and wicked up to the soil as it dries out ensuring that the plant is consistently watered but never waterlogged.
Plus, you can easily see when the water is out so you know exactly when your plant needs to be watered.
Voila! Happy healthy houseplants effortlessly (plus a soda bottle is kept out of the waste stream).
Making Soda Bottle Planters With Kids
These upcycled planters are a great craft to make with kids. I make sure to regularly include this one at my craft booth. I love sharing my passion for plants and kids love playing with dirt. But, cutting the soda bottles is not something I recommend kids do themselves. It requires sharp tools and is a bit tricky. I recommend an adult cuts the bottles leaving the kids to put the whole thing together then add the dirt and plants.
Advice From An Experienced House Plant Lover And Upcycler
I make no claims to have made up this craft but I have grown plants in these planters for years and have experimented with many design variations. There was a surprising learning curve with these even after reading tutorials online.
I experimented quite a bit with the bottle used, the type of string chosen for the wick, and how to secure the wick before I had a perfect self-watering planter.
I hope these instructions will help you make the perfect DIY self-watering planter on your first try.
How to Make Your Own Self Watering Planter
Materials & Tools
Soda Bottle
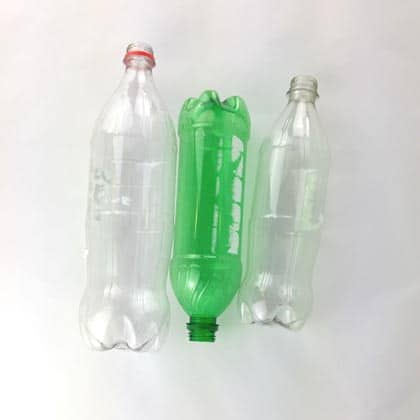
Most plastic bottles work fine for these but coke bottles are the best I have come across. When cut right above the bottom ridge they snap together making a very sturdy planter. Experiment and find your own favourite bottles to use.
10″ Rope
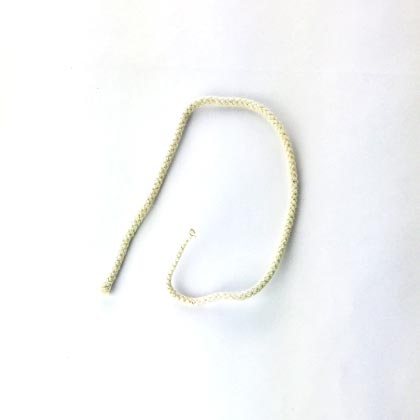
Outdoor cotton rope is my favourite but many other things will work as well. It simply needs to be able to absorb water and be fairly strong. I made the mistake of using t-shirt yarn in my first attempt and within months had to replace all the wicks.
Craft Knife or Scissors
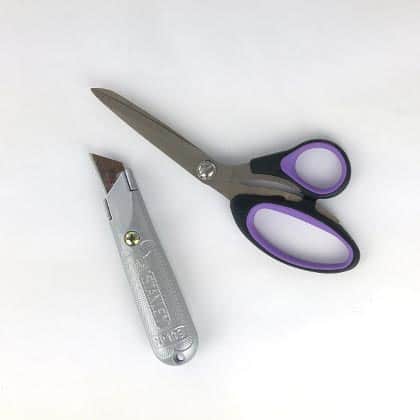
A sharp craft knife works best but sharp scissors can also be used.
Potting Soil & Houseplant
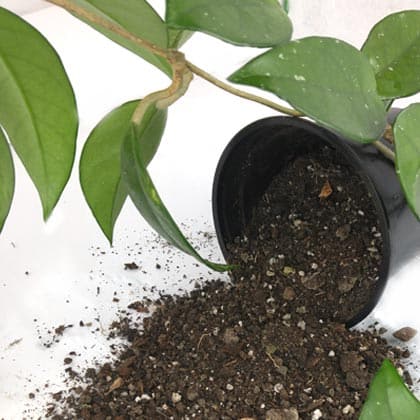
Ensure that you use very well-draining potting soil for this as you want the excess water to easily drain through the soil to be caught in the bottom water reservoir.
Instructions
How to make a pop bottle planter:
1. Cut Bottle
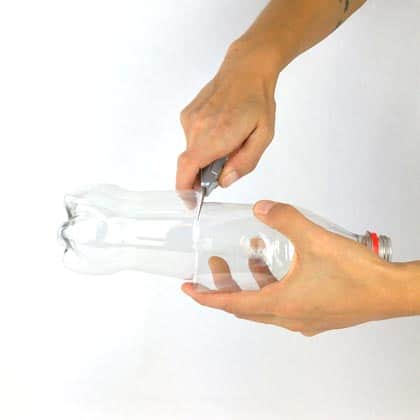
Where exactly you cut your bottle will depend on the shape of the bottle. Some bottles are shaped in such a way that they get thinner at certain places. Imagine how the bottles will fit together and do your best to predict the best place to cut.
Please be safe when cutting the bottle (unlike in this picture).
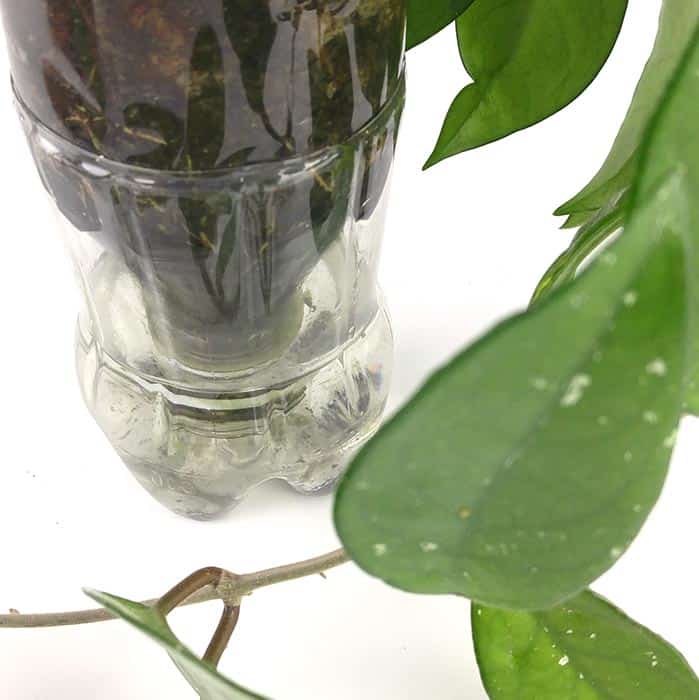
2. Add Wick
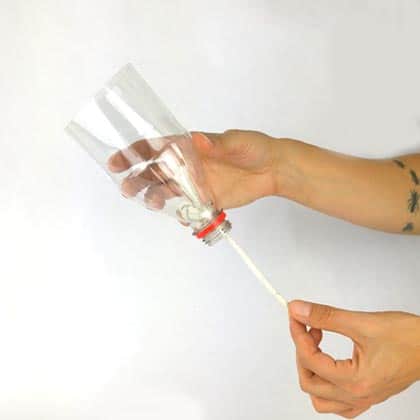
Tie a knot in the string that is large enough that it will not fit through the bottle opening. Insert the wick inside the bottle top so that the knot is inside the bottle and the wick is sticking out the opening.
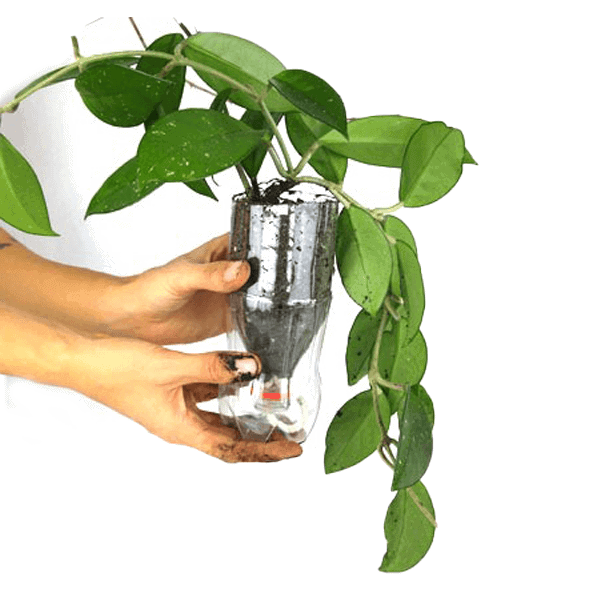
3. Add Dirt & Plant
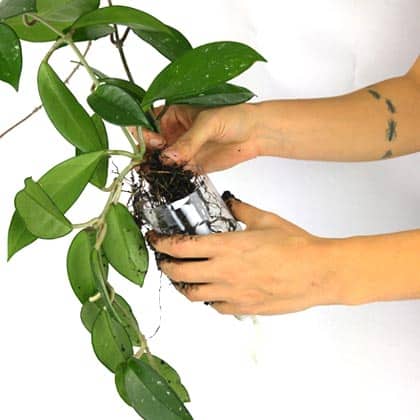
Add the dirt and plant to the top part of the bottle.
4. Water Carefully
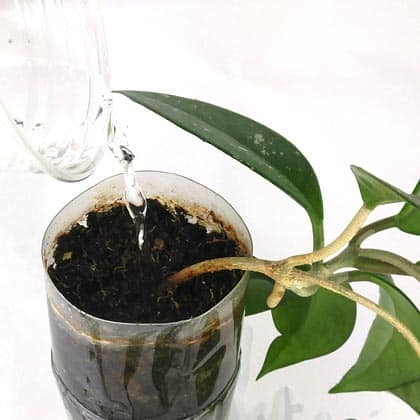
Add water to the reservoir and place the top bottle half inside the bottom making sure the wick is touching the water. You can carefully add a little bit of water onto the soil as well. The wick will slowly pull more water into the soil.